 |
|||
| 작성자 | Jurgen |
조회 : 8 회
댓글 : 0 건
|
|
| 분류 | 작성일 : 24-12-17 23:33 | ||
| IP | |||
별점평점상세정보
|
|||
See What In Wall Ethanol Fireplace Tricks The Celebs Are Utilizing
본문
An In Wall Ethanol Fireplace Adds Warmth and Ambiance
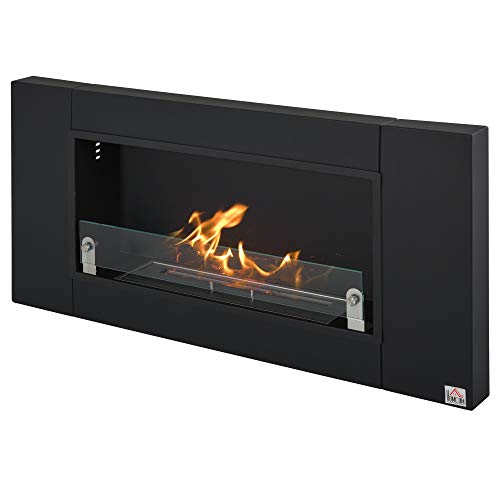 An in wall ethanol fireplace - article source, includes warmth and atmosphere to any space. They utilize bio-ethanol fuel and produce no smoke, making them safe to operate in homes and workplaces. They also offer supplemental heat and are easy to set up.
Before setting up a bio-ethanol fireplace, ensure that the location is clear of any flammable products. It should likewise be far from any windows or drapes that can ignite.
Cost
Ethanol fireplaces supply warmth and ambiance without the need for a chimney or gas line. They can be set up as wall-mounted units, freestanding pieces, or perhaps incorporated into furniture. They are typically preferred for their basic setup and real flame that offers a more authentic atmosphere. They are also popular in hotels and dining establishments because they offer an aesthetically pleasing focal point.
The cost of an ethanol fireplace depends upon its size, style, and installation. It can vary from $500 to over $10,000. You can purchase them in your home improvement shops or from online retailers. Some brand names use add-ons, such as clever innovation that permits you to manage the fireplace using your smartphone or a home speaker. Smart ethanol fireplaces are normally more costly, but they can save you cash in the long run.
In-wall ethanol fireplaces expense between $800 and $3,000. They can be upraised or custom. A prefabricated unit can be delivered instantly, while a custom-made one will require some time to produce. Some of the leading producers include NuFuel, Anywhere, Ignis, Planika, Eco-Feu, and Bio-Blaze.
Ethanol fireplaces are an excellent option for property owners who want to install a fire in their home but do not have the space for a bigger setup. They are easy to utilize and can be adapted to nearly any design. They are perfect for living spaces, bed rooms, and dining locations. They also work well in outside spaces.
An ethanol fireplace is simple to keep. You can keep it clean by guaranteeing that it is not near any combustible items or drapes. You can likewise keep it running by regularly changing the fuel. Make sure to close the cover before refueling the burner and to inspect it for any debris. Refueling a hot fireplace is unsafe and can cause the flame to burst.
Ethanol fireplaces are simple to utilize, however you should follow the security instructions that feature them. To utilize them, you will need to fill the burner with ethanol and light it. Then, you can change or snuff out the flame by pressing the cover over the opening. A 1-liter cylinder of bio-ethanol must last up to 4 hours.
Security
Ethanol fireplaces offer a stylish, modern-day option to gas or wood burning fireplaces. They burn bio ethanol, which is a sustainable and sustainable fuel made from farming byproducts. This fuel is not as flammable as nonrenewable fuel sources such as coal or petroleum, and it produces no smoke or soot. They can be mounted on a wall, freestanding, and even incorporated into furnishings. This makes them ideal for homes, apartment or condos, condos, and dining establishments.
Ethanol fires are simple to establish and need no ventilation, making them safe for use in nearly any location. They likewise utilize a safer option to charcoal, which is a substantial fire threat. In addition, ethanol fireplaces do not produce any damaging gases, and many models have a tool or built-in mechanism to snuff out the flames rapidly.
When acquiring an ethanol fireplace, be sure to check out the instructions carefully and use them in an ideal location. It is essential to keep in mind that ethanol fireplaces should never be moved while they are lit, as the liquid fuel can fire up the surrounding surroundings. This can cause personal injury and property damage.
Another safety issue with ethanol fireplaces is that they get really hot when burning, and individuals can easily be burned if they touch the burner or the surround. This is why it's essential to keep a security distance between the fireplace and combustible materials, such as drapes or curtains.
Finally, ethanol fireplaces are not as managed as other kinds of fireplaces and can be hazardous to children. This is because of their lack of venting and the truth that they can be utilized outdoors. Furthermore, they can be easily refueled, which can present a danger to kids.
The IGNIS ethanol fireplace has a special program called Ignites, which connects a fireplace specialist with users during the initial ignition of the fireplace. The program uses visual and verbal guidance to ensure that the fireplace is being used securely. This service is offered for all consumers, and remains in addition to the phone, email, text, and live chat assistance that IGNIS provides.
Installation
A wall mounted ethanol fireplace is an attractive way to add warmth and atmosphere to any space. They are simple to install and require no unique building and construction or certification. Nevertheless, it is crucial to follow the manufacturer's guidelines carefully to make sure a safe and safe installation. In addition, it is suggested to speak with an expert for any suggestions or help that might be necessary.
Ethanol fireplaces utilize liquid bio ethanol as fuel, which is an environment-friendly option to standard gas or wood fires. The combustion process is tidy and produces no smoke or ash. The fireplaces can likewise be installed in walls that do not require ventilation, making them a flexible choice for many rooms. They can be used in kitchens, living spaces, workplaces, and other areas.
Installing a wall-mounted ethanol fireplace requires some cautious preparation, however it can be done by a competent property owner with the right tools and knowledge. First, the wall needs to be checked to make sure that it is strong enough and that there are no blockages. It is likewise a good concept to make sure that the fireplace will not interfere with any vents or windows. Once the fireplace remains in location, you can cover it with a backer board and complete the wall with painting or tiling.
Another terrific function of these fireplaces is that they can be managed by a remote or by home automation systems. This makes them a hassle-free option for house owners who desire to enjoy a genuine flame however do not have the area for a conventional fireplace. Moreover, these fireplaces are safe to use inside since they do not produce any smoke or carbon monoxide gas.
Wall-mounted ethanol fireplaces are designed for simple setup and are available in numerous sizes to fit any area. The installation process differs from model to model, however the majority of are relatively straightforward. A typical installation involves choosing a location for the fireplace, finding the studs, and using a single bracket installing system. The fireplace should be checked before beginning the installation process to guarantee that it has actually not been harmed throughout shipping or storage.
Upkeep
An ethanol fireplace is a great addition to any home. It is easy to install and requires little maintenance. Unlike wood-burning fireplaces, bio-ethanol fireplaces do not produce soot or acidic ash, and they are not a fire danger. However, they should be cleaned periodically to ensure they continue to work correctly. The majority of models can be easily wiped down with a wet cloth or sponge. The burner might likewise end up being discolored with time, but it can be re-polished with a 3M sponge in simply a couple of minutes. It is important to make certain the fireplace is not lit and that all surface areas are cool before cleaning up.
Ethanol fireplaces utilize bioethanol fires wall mounted, an eco-friendly fuel made from agricultural by-products. This fuel burns cleanly, launching just water vapor and percentages of co2, comparable to human exhalation. This makes ethanol fireplaces an excellent alternative to traditional wood burning fireplaces, however they are not recommended as main heat sources. They work Best wall mounted bioethanol fires as extra heater, or as ornamental functions that supply atmosphere and warmth to a room.
When picking an ethanol fireplace, make sure to read the product description thoroughly. You must also follow the detailed guidelines supplied with your purchase. It is likewise important to make sure that the ethanol fireplace is operating 4 feet (a minimum of) away from any flammable objects like curtains and other designs. It is likewise essential to prevent overfilling the burner. Overfilling the burner could trigger your fireplace to overflow and produce a fire threat.
Many ethanol fireplaces include push-button controls, which can be utilized to control the flame height, temperature, and operation of the fire. Some likewise have built-hole in wall bioethanol fires timers, which allow you to shut off the fire when the allocated time has actually expired. These push-button controls are a fantastic choice for those who desire to avoid the trouble of managing a manual fire.
Ethanol fireplaces are offered in a wide variety of styles, making them an exceptional option for any design. They can be hung onto a wall, or recessed into the wall hung bioethanol fireplace to reduce their existence. They are a great choice for those who do not have the space or budget to install a full-sized fireplace in their homes.
An in wall ethanol fireplace - article source, includes warmth and atmosphere to any space. They utilize bio-ethanol fuel and produce no smoke, making them safe to operate in homes and workplaces. They also offer supplemental heat and are easy to set up.Before setting up a bio-ethanol fireplace, ensure that the location is clear of any flammable products. It should likewise be far from any windows or drapes that can ignite.
Cost
Ethanol fireplaces supply warmth and ambiance without the need for a chimney or gas line. They can be set up as wall-mounted units, freestanding pieces, or perhaps incorporated into furniture. They are typically preferred for their basic setup and real flame that offers a more authentic atmosphere. They are also popular in hotels and dining establishments because they offer an aesthetically pleasing focal point.
The cost of an ethanol fireplace depends upon its size, style, and installation. It can vary from $500 to over $10,000. You can purchase them in your home improvement shops or from online retailers. Some brand names use add-ons, such as clever innovation that permits you to manage the fireplace using your smartphone or a home speaker. Smart ethanol fireplaces are normally more costly, but they can save you cash in the long run.
In-wall ethanol fireplaces expense between $800 and $3,000. They can be upraised or custom. A prefabricated unit can be delivered instantly, while a custom-made one will require some time to produce. Some of the leading producers include NuFuel, Anywhere, Ignis, Planika, Eco-Feu, and Bio-Blaze.
Ethanol fireplaces are an excellent option for property owners who want to install a fire in their home but do not have the space for a bigger setup. They are easy to utilize and can be adapted to nearly any design. They are perfect for living spaces, bed rooms, and dining locations. They also work well in outside spaces.
An ethanol fireplace is simple to keep. You can keep it clean by guaranteeing that it is not near any combustible items or drapes. You can likewise keep it running by regularly changing the fuel. Make sure to close the cover before refueling the burner and to inspect it for any debris. Refueling a hot fireplace is unsafe and can cause the flame to burst.
Ethanol fireplaces are simple to utilize, however you should follow the security instructions that feature them. To utilize them, you will need to fill the burner with ethanol and light it. Then, you can change or snuff out the flame by pressing the cover over the opening. A 1-liter cylinder of bio-ethanol must last up to 4 hours.
Security
Ethanol fireplaces offer a stylish, modern-day option to gas or wood burning fireplaces. They burn bio ethanol, which is a sustainable and sustainable fuel made from farming byproducts. This fuel is not as flammable as nonrenewable fuel sources such as coal or petroleum, and it produces no smoke or soot. They can be mounted on a wall, freestanding, and even incorporated into furnishings. This makes them ideal for homes, apartment or condos, condos, and dining establishments.
Ethanol fires are simple to establish and need no ventilation, making them safe for use in nearly any location. They likewise utilize a safer option to charcoal, which is a substantial fire threat. In addition, ethanol fireplaces do not produce any damaging gases, and many models have a tool or built-in mechanism to snuff out the flames rapidly.
When acquiring an ethanol fireplace, be sure to check out the instructions carefully and use them in an ideal location. It is essential to keep in mind that ethanol fireplaces should never be moved while they are lit, as the liquid fuel can fire up the surrounding surroundings. This can cause personal injury and property damage.
Another safety issue with ethanol fireplaces is that they get really hot when burning, and individuals can easily be burned if they touch the burner or the surround. This is why it's essential to keep a security distance between the fireplace and combustible materials, such as drapes or curtains.
Finally, ethanol fireplaces are not as managed as other kinds of fireplaces and can be hazardous to children. This is because of their lack of venting and the truth that they can be utilized outdoors. Furthermore, they can be easily refueled, which can present a danger to kids.
The IGNIS ethanol fireplace has a special program called Ignites, which connects a fireplace specialist with users during the initial ignition of the fireplace. The program uses visual and verbal guidance to ensure that the fireplace is being used securely. This service is offered for all consumers, and remains in addition to the phone, email, text, and live chat assistance that IGNIS provides.
Installation
A wall mounted ethanol fireplace is an attractive way to add warmth and atmosphere to any space. They are simple to install and require no unique building and construction or certification. Nevertheless, it is crucial to follow the manufacturer's guidelines carefully to make sure a safe and safe installation. In addition, it is suggested to speak with an expert for any suggestions or help that might be necessary.
Ethanol fireplaces utilize liquid bio ethanol as fuel, which is an environment-friendly option to standard gas or wood fires. The combustion process is tidy and produces no smoke or ash. The fireplaces can likewise be installed in walls that do not require ventilation, making them a flexible choice for many rooms. They can be used in kitchens, living spaces, workplaces, and other areas.
Installing a wall-mounted ethanol fireplace requires some cautious preparation, however it can be done by a competent property owner with the right tools and knowledge. First, the wall needs to be checked to make sure that it is strong enough and that there are no blockages. It is likewise a good concept to make sure that the fireplace will not interfere with any vents or windows. Once the fireplace remains in location, you can cover it with a backer board and complete the wall with painting or tiling.
Another terrific function of these fireplaces is that they can be managed by a remote or by home automation systems. This makes them a hassle-free option for house owners who desire to enjoy a genuine flame however do not have the area for a conventional fireplace. Moreover, these fireplaces are safe to use inside since they do not produce any smoke or carbon monoxide gas.
Wall-mounted ethanol fireplaces are designed for simple setup and are available in numerous sizes to fit any area. The installation process differs from model to model, however the majority of are relatively straightforward. A typical installation involves choosing a location for the fireplace, finding the studs, and using a single bracket installing system. The fireplace should be checked before beginning the installation process to guarantee that it has actually not been harmed throughout shipping or storage.
Upkeep
An ethanol fireplace is a great addition to any home. It is easy to install and requires little maintenance. Unlike wood-burning fireplaces, bio-ethanol fireplaces do not produce soot or acidic ash, and they are not a fire danger. However, they should be cleaned periodically to ensure they continue to work correctly. The majority of models can be easily wiped down with a wet cloth or sponge. The burner might likewise end up being discolored with time, but it can be re-polished with a 3M sponge in simply a couple of minutes. It is important to make certain the fireplace is not lit and that all surface areas are cool before cleaning up.
Ethanol fireplaces utilize bioethanol fires wall mounted, an eco-friendly fuel made from agricultural by-products. This fuel burns cleanly, launching just water vapor and percentages of co2, comparable to human exhalation. This makes ethanol fireplaces an excellent alternative to traditional wood burning fireplaces, however they are not recommended as main heat sources. They work Best wall mounted bioethanol fires as extra heater, or as ornamental functions that supply atmosphere and warmth to a room.
When picking an ethanol fireplace, make sure to read the product description thoroughly. You must also follow the detailed guidelines supplied with your purchase. It is likewise important to make sure that the ethanol fireplace is operating 4 feet (a minimum of) away from any flammable objects like curtains and other designs. It is likewise essential to prevent overfilling the burner. Overfilling the burner could trigger your fireplace to overflow and produce a fire threat.
Many ethanol fireplaces include push-button controls, which can be utilized to control the flame height, temperature, and operation of the fire. Some likewise have built-hole in wall bioethanol fires timers, which allow you to shut off the fire when the allocated time has actually expired. These push-button controls are a fantastic choice for those who desire to avoid the trouble of managing a manual fire.
Ethanol fireplaces are offered in a wide variety of styles, making them an exceptional option for any design. They can be hung onto a wall, or recessed into the wall hung bioethanol fireplace to reduce their existence. They are a great choice for those who do not have the space or budget to install a full-sized fireplace in their homes.
댓글목록
등록된 댓글이 없습니다.